|
|
|
![]() hese rules were
compiled by C.J. Burke. Thanks for this good work.
hese rules were
compiled by C.J. Burke. Thanks for this good work.
At the bottom of this page you'll find some deck ideas...
(version 0.2)
Guardians is a great Collectible Card Game formerly produced by FPG, Inc.
The game is no longer supported, except by fans who have played the games
since its inception or since picking up discounted cards.
One problem with picking up discounted cards: if you can't find a starter
deck, you don't have the rules. (There are other things you may not have
either, but the rules are the most important.) This is an effort to correct
that problem. What follows are a quick set of rules for playing the game.
They get more complex as the go along. All that
is listed is what you *can* do, not what you *should* do. For playing tips,
go elsewhere.
THE DECK
The first thing you need is a deck. It must have at least 55 cards, and no more than 5 of any card, except terrain and shields. There is a limit of 1 Guardian (who isn't part of the deck). The only restricted card is Champs, the Wonder Dog from Dagger Isle. If you don't have one of them, don't worry about that now. (Note that *all* card limitations are typical tournament rules and are not actually found in any of the rulebooks. But they are good ideas.)
SHIELDS? WHAT ARE SHIELDS?
If the only cards that you have came from Limited or Revised edition booster
packs, you didn't get any shield sets, although you probably got some standard
bearers (which are also Shields).

Shield sets only appeared in starter packs. Individual shields were introduced
in each of the expansion sets: Dagger Isle, Drifters Nexus and Necropolis
Park. Also, there were Shield/Terrain cards in Dagger Isle, but don't worry
about these either, just yet.
You'll need anywhere from 6 to 10 shields in a deck. The exact number depends upon deck design which isn't covered here. If you don't have that many shields, my suggestion has always been to take a creature or terrain that isn't in your deck and declare before the game that this card is you shield. Treat it as such during the game.
GUARDIANS
Your Guardian sits in front of you, and represents you. If you don't have
a Guardian, put the King of Hearts (or any other card) in front of you and
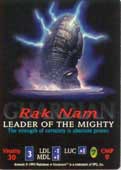
write down these stats: Vitality 30, Stones 7, CMP 9, Base Draw 3, LDL -1,
MDL +1, LUC +1. These are the statistics for the Guardian Rak Nam, only available
in starter decks. For other Guardians, some with special abilities, check
out a spoiler list.
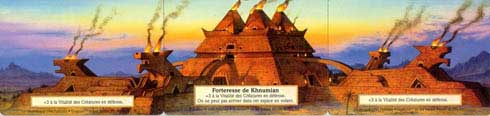
STRONGHOLDS
Strongholds are sets of three cards. Three sets were available only in starter
decks. Each expansion set has a stronghold set that has to be collected.
If you don't have a full set of strongholds, put any three cards horizontally
in front of the Guardian and write the following on them "+5 to defend".
For descriptions of other strongholds, check out a spoiler list.
(Another joke: use three Magic(tm) Walls of Wood and say that they provide 3 point defense. Well, they look cool, anyway.)
THE GAME
You play a Guardian. You control armies of creatures that travel under Shields
into the "disputed lands" between you and your opponent. There
are three lands in front of your stronghold that are considered to be under
your control at the beginning of the game. There are also three in front
of your opponent under his control.
The object of the game is to take control of all six lands OR to destroy
five of your opponents Shields OR to kill his Guardian.
How to Play
Shuffle all your cards, except the Guardian and Strongholds. Even though
some of the card backs have a single-line border and some a double-line border,
they are all shuffled together in one deck. Let your opponent cut the deck.
DRAW AND ORGANIZE PHASE
The first phase is called the Draw & Organize phase. Draw 12 cards. Separate
the single-border cards (Creatures, 'C' Creature Magic Items, Shields and
Terrain) and double-border cards (Spells, 'H' Hand Magic Items, bribery cards).
If you didn't draw any shields, you may spend a stone and reshuffle the deck and draw again.
Place Creatures
There are four places for your creatures to go: on a stronghold under a shield,
on a stronghold without a shield, under a stronghold or in your Creature
Pen, which is underneath your Guardian.
All creatures are placed face down.
You may not have more than 30 points on or under any space at any time. You
may have creature both on and under the same stronghold space at one time,
but their total must be 30 points or under. Also, some creatures have penalty
numbers, red numbers underneath their vitality numbers. For example, a Gunner
has a Vitality of 4/6. He has a Vitaly of 4 but stacks as if he were a 6.
You may stack creature Magic Items under any stack, do you cannot have more than magic items than creatures in any stack.
Channelers
Channeling is a way to temporarily increase a creature's Vitality in combat.
Some creatures can only channel; others can only accept channeling. A few
can do both. Most creatures do neither, unless under the affects of a Spell.
Any creature that has a number under the CMP label in the lower right corner of the card can channel. (It doesn't matter if the bar above the number is red or green -- that's for *receiving* channeling). Creatures that can channel do not have to, but if you want them to during the turn, you must place them underneath a stronghold.
This shows that you have the intention to channel this turn.
Other placement
Stronghold Upgrades: these get placed next to either your left stronghold
or your right stronghold during the Draw and Organize phase. Once placed,
you can't remove them. No more than one on the left and one on the right.

Put your terrain, extra shields and extra creatures and creature magic items
in your Creature Pen, underneath your Guardian.
Put all double-border cards face-down next to your Guardian.
Shields
Place Shields face-up on top of the stacks of creatures. You may only have
one Standard Bearer in play at a time.
Creatures can only move if they're under a Shield. If you don't have any Shields, your creatures cannot move (and your opponent will have a distinct advantage during this turn).
Who Places First?
Sometimes players try to "out-wait" each other, waiting to see
where their opponents place their shields so they can react to it. If this
becomes a problem, flip a coin to decide who must place something first and
then alternate until finished. Another possibility is a "house rule" --
turn over your Up card at the beginning of the D&O phase instead of the
Movement phase (see below).
MOVEMENT PHASE
Turn your Up card
Turn over the top card on your deck. This is your Up card. The player whose "Up
Number" is higher goes first. If both cards have the same number, put
them on the bottom of your deck and turn another card. Note: Creatures use
their Vitality number for their Up number; they don't use the red penalty
number.
The player with the higher Up number goes first and then the turn alternates
until every shield has been "turned".
Movement
On your turn, you must turn a Shield. That is, you rotate a shield 180 degrees
so that it faces away from you. After you turn the shield you may do one
of the following:
- move the shield one or two spaces (not diagonally)
- fly a shield one or two spaces (if it only contains fliers)
- re-inforce a shield (put more creatures in it)
You may not move past a space that has no terrain, an opponent's terrain
or an opponent's shield unless your shield is flying.
If your shield flies, you must show its contents to your opponent. You may
only fly one shield per turn.
If you move unto a terrain occupied by an opponent's shield, go to Combat
immediately.
You cannot stop on a terrain that already has one of your own Shields on
it, but you may pass through such a space.
Reinforcing a Shield
This can get complicated.
You may reinforce a shiel with any creature from your strongholds so long
as the creatures are not under a turned shield. (They may be unshielded
or under an unturned shield.) They are subject to the same movement rules
that
shields are. For example, you can't reinforce over an opponent's terrain
unless your creatures fly.
And the creatures are still limited to two spaces
of movement. After reinforcing, your shield is still limited to 30 points.
Note: The shield that you re-inforce does NOT have to be the same shield
as the one you turned. However, you may not reinforce to a shield that
has not been turned yet.
You cannot move creatures FROM a shield in the disputed lands TO another
shield or to your stronghold.
Picking Up and Dropping Off Creatures
If a Shield moves through a Stronghold space, it may drop some of the creatures
under it onto the space and continue moving (up to its limit). Likewise,
if there is room under the Shield, it may pick up a creature from the Stronghold
space.
There are two restrictions: You cannot drop a creature onto a space that
has an UNTURNED shield, and you cannot pick up a creature from a space that
has a TURNED shield. This prevent creatures from moving more spaces than
they are allowed.
Replacing Creatures
Similar to reinforcing, you can replace the contents of a shield that is
right in front of your stronghold with creatures that are in the stronghold
spaces adjacent to your Shield. That's not as complicated as it sounds --
in fact, it becomes quite obvious when you start playing.
If your Shield is, say, in the center terrain in front of your stronghold
and you have creatures on your center stronghold, you can do the following:
turn your shield, move onto your stronghold, pick up and drop off as many
creatures as you want so long as the Shield doesn't exceed its limit, then
move back to the terrain you started from.
COMBAT
This is the heart of Guardians: two Shields going to combat.
Pick up all the cards under your shield into your Combat Hand. You may also
pick up all your double-bordered cards from your Storage Hand. You CANNOT
take any of your creatures out of your Creature Pen. That's the reason that
they're kept under the Guardian, so you can't pick them up by accident. (Sure,
it was an "accident".)
The attacker declares first if he is playing a command card. (Not which card,
just whether or not one will be played.)
A command card is a sort of spell that takes place before you begin combat.
It might be one of the following: a Spell (like Ice Storm or Vitales Dark
Cloud) that states that it must be used as a Command Card, a Hand Magic Item
(like Medallion of Skyphos from Drifters Nexus) that states it must be used
as a Command Card, or a creature that has a command ability.
A command ability differs from a regular ability in that it is preceded by
'C' with a line through it. Also, the spell portion of the text box will
be in italics.
After the attacker declares whether or not to play one, the defender declares
whether he will use one. They are then revealed together.
You may each only play one command card.
If the two cards are contradictory, the one with the lower Up Number is dispelled.
If they have the same Up Number, they're both dispelled.
Ex. 1: Vitales Dark Cloud vs. Sorcerer P>No contradiction. Both AOEs
take effect.
Ex. 2: Visionary vs Seer.
Both require that the opponent state something about their creature before
combat, which is a contradiction. Since both have Vitality 5, both are dispelled.
Ex. 3: Trumpeter vs Baleful Eye.
One requires that all Demons and Devils be played first, while the other
requires the opponent to announce the size of his creatures. Strangely enough,
these can both be done, so neither is dispelled.
Ex. 4: Uras, Overlord of the Mountains vs. Slor, Overlord of the Wastes
They both change the terrain type for the rest of the combat. Slor has the
higher Up number, the terrain becomes Dry Heaps. Uras is dispelled. (And
it is keeping with the spirit of the game for the "Slor" player
to announce, "Ha! I dispelled Uras!")
If the command card forces the two into combat, go to the Primary Attack
section, below.
AOE attacks
So what's this AOE attack on some of the cards? AOE stands for "Area
of Effect" and it attacks every creature in the opponent's hand (but
not the ones that are on the table).
If the Sorcerer casts a 4-point fire AOE, every creature in the opponent's
hand that have a Vitality of 4 or less (Note: use the actual Vitality, not
the red Stacking number, if there is one.) are discarded. This can conceivably
wipe out your entire hand. It might also have no effect at all. Additionally,
since this AOE is a "fire" attack, all creature with immunity to
fire are immune to this attack.
If the card had a "fear" AOE, creatures immune to fear attacks
would be immune to that attack as well.
If the card just says "AOE", there is only one creature that is
immune to it -- the Blackthwaite Jumper, which is immune to ALL AOEs.
The final type of AOE attack is, believe it or not, methane, which is only used by two creatures: Cow and Mayor McEvil. The rules for methane are on the Cow card.
The creatures are NOT discarded, but are set to the side, out
of play, and cannot fight. They can, however, be attacked by the opponent.
PRIMARY ATTACKS
Okay, you've gotten past the command card step. Now, it's time to go head-to-head.
Each player picks one card from their hand and they are laid on the table
simultaneously. Now it's time to see who wins.
But first ---
BRIBERY
-- there are a few steps before you get to actually kill each other.
Once both creatures are revealed, both players have the opportunity to bribe
his opponent's creature away. There are up to three icons on the bottom of
the creature cards: a beer mug, a gold coin, and a pair of lips (Babes).
If a creature has one or more of these, it can be bribed away by the appropriate
bribery card.
Bribery must be the first thing you do in a primary match-up. If you decide not to bribe, you cannot change your mind later when your opponent does something really nasty that you weren't expecting. Likewise, you must give your opponent the opportunity to bribe you -- you can't speed-play into something nasty and tell him its too late.

Standard example:
Sand Lord vs. Swordsman: the Sand Lord has Vitality 11 and is bribeable by
Babes, the Swordsman is a 6 that is bribeable by Gold.
Possibility 1: Swordsman bribes Sand Lord with Babes. Sand Lord player may
also bribe Swordsman with Gold or leave him unchallenged.
Possibility 2: Sand Lord player bribes Swordsman with Gold. Swordsman can
bribe or not, but he can't do anything else.
Possibility 3: Swordsman player doesn't have a Babes, but does have
a St. Ballantine's Evocation (which destroys the Knight and its opponent).
He quickly
plays it as soon as its obvious that he'll lose anyway. Sand Lord player
screams "Wait a minute: I was going to bribe you." Swordsman player
has to take back the spell. Oops.
Possibility 4: Swordsman player doesn't have a Babes, but does have
a St. Ballantine's Evocation (which destroys the Knight and its opponent).
He pauses
and says, "Are you bribing me?" Sand Lord player says "No".
Bombs away. Sand Lord player can't change his mind now -- both creatures
are destroyed.
SPELLS
There are Spells that can be cast "at any time". You can cast
one of these now, or at any time AFTER bribery. These include St. Ballentine's
Evocation, Power Lunch, etc.
DESTRUCTION
If either creature has a "Destroys x" condition where x could be "creatures
bribeable by Gold" or "Mortals affected by fear" or whatever,
this takes place before anything else.
If the Merchant goes up against the Swordsman, the Swordsman is destroyed
and goes immediately to the discard pile. However, if the Swordsman had St.
Ballentine's Evocation, it could have be cast prior to the destruction step
and thus destroying both creatures. Or the Merchant could have been bribed
by Babes to prevent the destruction.
AOE attacks
Not all AOE attacks are command cards, some use their attacks during primary
attacks. They are resolved after destruction. Thus, if a Sorcerer goes up
against a Merchant, the Sorcerer is destroyed before the AOE can attack.
If the Sorcerer bribes the Merchant away, then the AOE goes into effect and
the opponent discards creatures.
IMMUNITY
Some creatures are immune to fire or immune to fear. Others are immune to
flying creatures, mortals or externals, etc. If one creature is immune to
its attacker, turn the attacker around (so that its head is facing the player
who played it) to indicate that no damage has been done. The immune creature
does damage as normal.
Text Box
Okay, so what about the other stuff. Any other ability, spell, bonus or whatever
that is described in the text box goes into effect now.
Off-Color Bonus
A Vitality 6 swordsman against a Vitality 11 Sand Lord doesn't look too pretty,
does it. But it isn't as bad as it looks. White-border creatures (a.k.a.
Mortals) get an Off-Color Bonus against brown-border creatures (a.k.a. Elementals)
which get an Off-Color Bonus against black-border creatures (a.k.a. Externals)
which get an Off-Color Bonus against white-border creatures. Sorta like Rock-Paper-Scissors.
Confused? Hard to remember? It's easy: there's a little oval with a number
in it toward the bottom of the card. The oval is the color of the type of
creature that it gets a bonus against.
In the example above, the Swordsman gets a +3 bonus against all Elementals,
like the Sand Lord. That gives him a Vitality of 9. Now he's only losing
by two points -- and we're not done here.
The Sand Lord also has an OCB of 3, but it only applies against black-border
Externals, so he stays at 11.
TERRAIN BONUS
Some creatures get a bonus based on the terrain the battle is taking place
on. (The Sand Lord is unique in that it also has a penalty for battles on
a particular terrain.)
If the battle is taking place on the Dry Heaps, the the Sand Lord gets a
big 6-point Vitality boost, but if it's in the Woods, it becomes a 6-point
penalty. Obviously, this can tip the balance of the combat.
Can you change the terrain type? Sure, two ways: first, if there's an Overlord
command card in play (from Drifters Nexus), the terrain type has been changed
already. Second, drop a Hammer of Doom to destroy the terrain. No terrain
= no terrain bonus (there is an exception, but let's not get into that now).
There are other cards that fiddle with the terrain, but Hammer of Doom is
the only one that does it in the middle of a combat.
OTHER MODIFIERS
(These can take place in any order.)
Ranged Attacks
If your fighting in any terrain other than Woods, you can fire a ranged-attack
into any primary attack. Only creatures that say "n pt. ranged-attack" (where
n is any number) can be used.
To play a ranged-attacker, place the creature next to your primary attacker,
but tilt it in toward the battle. The amount of your ranged-attack is added
to the Vitality of your primary attacker.
For instance, the Sand Lord and Swordsman are still at it. The Sand Lord
is Vitality 11, the Swordsman is Vitality 6 + 3 for his Off-Color Bonus for
a total of 9. The combat isn't taking place in Woods (if it were, the Sand
Lord would have a penalty of -6, making him Vitality 5 and he'd be beaten!)
so an Archer (Vitality 6, 3 pt ranged-attack) can be played. The Swordsman
now has a Vitality of 12 and will beat the Sand Lord unless he plays his
own ranged attack, a Gold bribery or something sneaky.
Ranged attackers can be bribed like regular creatures. They cannot be attacked,
not even by your opponent's ranged attackers.
CHANNELING
This is the biggie. Read it twice or three times. Make sure you understand
it because the game depends on it.
Channeling is a way to boost a creature's Vitality temporarily to help it
win combats.
Creatures with a green bar in the lower right corner (over the letters "CMP")
can automatically receive channeling. Creatures with a red bar cannot receive
channeling unless a Spell, command card or some other effect allows them
to.
Where does the channeling come from? Two sources: first, those faced-down
channellers that you placed under your stronghold during the Draw & Organize
phase; second, your Guardian.
To use a channeling creature, just reveal it. It adds the number of CMP to
the attacking creature's Vitality. Channeling creatures may be used once
per turn on any turn of the game. Some have restrictions on what creature
type they may cast to; others allow channeling to certain creatures including
ones that normally cannot receive channeling.
To use your Guardian to channel, simply spend a stone. Your creature gains
the Guardian's CMP in addition to its Vitality. You may spend multiple stones
to channel to a single creature, but if you run out of stones, you can no
longer channel.
LIMITS on channeling: a creature can only receive up to it base Vitality
in channeling (effectively doubling it) unless the card says otherwise. For
example: if you first play a Power Lunch spell, the Sand Lord can receive
up to 11 points of channeling, regardless of terrain and off-color bonuses
(or penalties) or ranged-attackers.
A Valkyrie Spirit (CMP 3, channels only to Knights, including those that
normally cannot receive channelling) can give its full 3 points to the Swordsman,
and a second Vakyrie Spirit can give another 3 points. However, a third one
would be ineffective; the Swordsman have received as much as he could handle.
Even the Guardian couldn't give him any more.
IS IT OVER YET?
After you've finished adding in bonuses, casting Spells, channeling and placing ranged attackers, figure out which creature has the most Vitality. Place the winning card so that it overlaps the loser to signify victory.
Now you're ready for the next primary attack. Each player picks one more
card and does it all over again.
This goes on until either player runs out of cards. At that point, we come
to . . .
SECONDARY ATTACKS
When one player has creatures left over, he gets to play secondary attacks.
That is, you get to pick off any of your opponent's remaining creatures.
You may attack his command card or any ranged attacker, or you may attack
a creature that won a primary match-up. Your attacking creature gets all
bonuses from its text box, for terrain, for off-color and channelling. THERE
ARE NO RANGED ATTACKS during Secondary Attacks.
HOWEVER, remember how the word "temporarily" was used before?
Well, it's over now. During second attackers, all Vitality bonuses from the
primary
attacks are GONE. All text boxes are, in effect, blanked out. (The exception
to this are text boxes that specifically apply to secondary attacks or for
the duration of the combat.)
While you may attack any creature, if you attack a primary attacker, you
get the full Base Vitality of your primary attacker as a bonus to your secondary
attacker.
Secondary attackers, like all attackers, may be bribed.
Example:
Chris played a Sorceror (as a command card), a Sand Lord, Devil Dog (Vitality
6, immune to fire).
Bill played an Iron Crag Baggler (as a command card, dispels opponent's command
card), a Swordsman plus an Archer as a ranged attack, and a Fire Walker (Vitality
9, fire-based attack).
Suppose Chris has remaining creatures, here are his options:
- he can attack the pesky command card, but he needs five points of vitality
(including bonuses and channeling) to kill it. The Iron Crag Baggler cannot
defend itself, except to bribe the creature away.
- he can attack the Archer, but he needs seven points of vitality.
- he can attack the Fire Walker, in which case he needs only four points
because the Devil Dog already did 6 points.
- he can kill the Swordsman outright with any creature that attacks, even
a Vitality 0 Idiot. This is because the Sand Lord is a 11, and the Swordsman
goes back to being a 6. Back you must have *something* to attack him with,
it isn't an automatic win.
Suppose Bill had a remaining creature, which is at most five points of Vitality
(beacause he's already played 25)
- he can attack the Sorceror, but needs nine points to kill it (which is
possible if his creature can accept channeling)
- he can attack the Devil Dog, but need a full seven points because the Fire
Walker didn't do any damage during the primary rounds. That's why the card
is rotated 180 degrees as a reminder. However, Bill doesn't have to worry
any more about that silly immunity to fire -- like all other bonuses, it
goes away!
Question: If the Sand Lord had been Power Lunched and then received channeling
to beat the Swordsman, what would his secondary need to kill it?
Answer: the Sand Lord is an 11, the Swordsman is a 6. He needs another six.
All bonuses go away including the Sand Lord terrain *penalty*, had there
been one, including OCB, including the Archer's ranged attack. Any channeling
is lost, too.
MUTLIPLE SECONDARY ATTACKERS
Can multiple creatures attack the same creature during secondary attacks?
Absolutely, but its important to note that the "ALL BONUSES GO AWAY" rule
applies to your secondaries if you place a "secondary secondary".
That is, only the last creature you play gets its OCB, terrain bonus and
channeling. All other attackers get only their base Vitality.
Confused? That's normal. Try it out a few times and you'll get the hang
of it.
Hopefully, I'll come up with a good sample hand that illustrates all these points.
COMBAT EXAMPLES
Example 1:
Chris's Shield:
• Super Model (1/4)
• Snogwart (8)
• Archer (6)
• Wraith (8)
• Wild Nymph (4)
Bill's Shield
• Floyd, the Flying Pig (2)
• Ugly Wart Fiend (1)
• Baal-a-Gog (12)
• Devil Dog (6)
• Ice Spirt (5)
• Gn'Omish Gnomes (4)
Chris attacks Bill in Swamps. Chris announces that he is playing a command
card. Bill decides to cast one of his own.
Chris casts a Spell: Vitales Dark Cloud (4 point AOE). Bill uses a creature
command card: Floyd, the Flying Pig (+2 to your primary attackers, Floyd
is destroyed.)
Bill will lose two creatures if Chris's Spell takes effect, so he casts a
Dispel Magic. (Thankfully, he had one.) Chris is unable dispel the Dispel
Magic (he could if hehad his own Dispel Magic, but in this example, he doesn't),
so Vitales fizzles.
Next comes the primary attackers.
Bill selects the Ugly Wart Fiend (no Babes bribery unless the Ugly Wart Fiend
is bribed first) to protect Baal-a-Gog, which he'll play later. Chris plays
the Wild Nymph simultaneously.
Wild Nymph is Vitality 4, +1 OCB. Ugly Wart Fiend is Vitality 1, +2 for Floyd's
bonus. Bill has no ranged-attacks. The Fiend cannot receive channeling, and
if it could (via a Power Lunch), it could only receive one point of channeling
anyway. So the Fiend is beaten. The Nymph card is placed overlapping the
Fiend.
Chris next plays the Snogwart against Bill's Devil Dog. The Devil Dog is
immune to fire, but the Snogwart does not have a fire-based attack. The Snogwart
has a terrain bonus for Dry Heaps, but they're not in the Dry Heaps.
Snogwart is 8, +2 for OCB. Devil Dog is 6, +2 for Floyd. Snogwart wins.
Next, Chris plays the Wraith and Bill plays the Ice Spirit. The Wraith can
receive up to 16 points of channeling, but the Ice Spirit is immune to Undead
and the Wraith is Undead.
Wraith is 8 (but does no damage). Ice Spirit is 5, +2 OCB, +2 for Floyd.
Ice Spirit has 9 to the Wraith's 8. Chris has two options: channel to the
Wraith to raise its Vitality (though no damage will be done) or use the Archer,
which will also raise the Wraith's Vitality, but won't do enough damage to
kill the Ice Spirit. The other choice is to do nothing, let the Wraith die
and then, if he has a secondary attacker, kill the Ice Spirit later.
Chris decides to spend a stone. For this example, his Guardian is Tes Let
who has CMP 7, so spending one stone will add 7 points of Vitality to the
Wraith for a total of 15. Both creatures survive, but the Wraith is rotated
180 degrees to show that no damage has occured to the Ice Spirit.
Each player has two creatures left, though neither knows how many the opponent
has. Chris has put down 20 points of Vitality. Bill has put down 14.
Bill knows that there are only 10 points left to fight, his Baal-a-Gog is
in good shape. And if he has saves the Gnomes, they'll be enough to kill
that miserable Wraith. Gnomes could also kill the Snogwart or Wild Nymph
as well, but the Wraith is the deadliest of the creatures he's seen so far.
But if he Chris has more than one creature, then Bill doesn't get any secondary
attacks.
Chris knows that he has 10 points of stacking, but they're only worth 7 points
of fighting. (The Super Model is Vitality 1, but stacks as 4). The Super
Model won't be able to kill the Ice Spirit as a secondary attacker (if she
gets to attack as one) and will probably only kill something if it's bribeable
by Babes. Chris also guesses that Bill has more than one creature left. Why?
Because Bill dispelled an AOE attack that would have destroyed only one creature
in play, and it has Vitality 1. Seems like a waste of a Dispel Magic for
one point. He probably has at least one more small creature.
Chris decides to play the Super Model. Bill plays Baal-a-Gog.
BLAM! Baal-a-Gog is destroyed. Bill can bribe by Gold, if he had one,
but he doesn't. So it's gone. Baal-a-Gog goes immediately to the discard
pile
and cannot be "heal"ed. (On a technical note: Baal-a-Gog is still
considered to be "lost" if you have a spell or ability that allows
you to reclaim "lost" creatures.)
Chris plays the Archer last. Bill plays the Gn'Omish Gnomes. The Archer has
Vitality 6. The Gnomes have Vitality 4, +2 for Floyd. Push. No one wins.
Both creatures survive.
Chris announces that he has no more creatures (which is obvious because he
has played 30 points). Bill announces the same (he's also played 30 points).
All of Chris's creatures survived. Total vitality is 30. Bill has Ice Spirit
and Gn'Omish Gnomes for a total vitality of 9. Bill has to retreat (and hopefully
reinforce quickly!).
Example 2:
I pulled some random cards out of a starter pack for this. I want to illustrate
what happens when the cards are played in different orders.
Terrain is Woods, no ranged attacks.
Brian's Shield:
1. Wood Nymph (8)
2. Ice Ogre (9)
3. Sun Spirit (12)
Matt's Shield:
A. Amber Well (4)
B. Gorgal Skag (4)
C. Black Lung (14)
D. Rock Spirit (5)
I want to illustrate how differently the same cards can be played and the
different results.
There's only one command card here, the Rock Spirit, which only applies to
Strongholds, which this isn't, so there isn't any reason to play it.
Example 2a: 1A, 2B, 3C, D.
Wood Nymph vs. Amber Well: 8 + 3 (terrain) vs. 4 + 0 (OCB). Amber Well is
squished. (But that's okay because you *want* the Amber Well beaten.)
Ice Ogre vs. Gorgal Skag: 9 + 2 (OCB) vs. 4. You can't channel against Ogres;
Skag doesn't receive channeling, and even if it did, it couldn't accept enough.
Skag dies.
Sun Spirit vs. Black Lung: 12 + 6 (OCB) vs. 14. Sun Spirit wins. Black Lung
isn't immune to fire and can't receive channeling. It is beaten.
Brian announces he's done. Matt still has the Rock Spirit, which is a 5 with
an OCB of 1. That's enough to kill any of Brian's creatures (note that the
Wood Nymph's terrain bonus goes away as does the Ice Ogre's and Sun Spirit's
off-color bonuses). Matt attacks the Sun Spirit.
Sun Spirit vs Black Lung & Rock Spirit: 12 vs. 14 + 5. Sun Spirit
cannot defend, channel, etc. Rock Spirit is unbribeable. Sun Spirit is
beaten.
Brian has Wood Nymph and Ice Ogre for 17. Matt has the Rock Spirit for 5.
Matt retreats.
Example 2b: same as above, but with bribery.
If the Ice Ogre had been bribed away, the Gorgal Skag would have survived.
The end result is Wood Nymph for 8 vs Rock Spirit and Gorgal Skag for 9.
Brian has to retreat; Matt gets (or keeps) the space.
Example 2c: 2A, 3B, 1C, D.
Ice Ogre vs Amber Well: 9 + 2 (OCB) vs 4 -- Amber Well is beaten.
Sun Spirit vs Gorgal Skag: 12 vs 4 -- Gorgal Skag is beaten.
Wood Nymph vs Black Lung: 8 + 3 (terrain) vs 14 -- Wood Nymph is beaten.
Rock Spirit is not powerful enough to beat Sun Spirit (4 + 5 vs 12) unless
you can make it a channel receiver and then channel to it. However, the Amber
Well's special ability will let the Rock Spirit beat the Ice Ogre (8 + 5
vs 9). Rock Spirit beats Ice Ogre.
Brian has 12. Matt has 19. Matt keeps control.
Example 2d: 2D, 3A, 1B, C.
Ice Ogre vs Rock Spirit: Rock Spirit dies.
Sun Spirit vs Amber Well: Amber Well dies.
Wood Nymph vs Gorgal Skag: Gorgal Skag dies.
Black Lung vs whatever: whatever it wants to kill dies. That nasty Sun Spirit
would be a good choice.
Brian has Wood Nymph and Ice Ogre (17); Matt has Black Lung (14). Matt retreats.
Again, if Ice Ogre had been bribed, Matt could have won the space (and the
Gorgal Skag would have survived).
Confused? That's normal. Try it out a few times and you'll get the hang of
it.
Hopefully, I'll come up with a good sample hand that illustrates all these points.
COMBAT RESOLUTION
After Combat has ended, you must determine who won.
The attacker discards his beaten creatures and gathers together his remaining creatures. The defender does the same. Each player than adds the total Vitality of his creatures -- NOT THE STACKING VITALITY! Don't use the red penalty number, if the creature has one. Also, creatures who did no damage due to immunity (e.g., a
Sun Spirit does know damage do a Devil Dog) DO count for
control of the space.
The only exceptions are creatures who were bribed (there not on the space
anymore, even if they did technically survive) and creatures that, for whatever
reason (Spell, command card, etc.) are out of play and don't count for control
of the space.
If the attacking Shield has more Vitality than the defender, it wins control
of the Space and the defender must retreat his Shield (even if already turned)
one Space in any direction, as long as it lands on a space under that player's
control. He may retreat to a space that has another of his shields on it,
but if he does so, one shield is discarded (this counts for the opponent's
goal) and creatures are also discarded so that it is under the 30 point limit.
If either of the two Shields involved were turned, the remaining shield is
turned.
If the defending shield has the same Vitality as the attacker or more, that
shield retains control of the space and the attacker retreats. The attacker
MUST retreat one space in the direction it came in even if it traveled TWO
spaces before combat, even if it has a shield there already (combine Shields
as above).
The loser in combat has the choice to destroy the entire Shield and all creatures
within it (this counts for opponent's goal) -- this may be prudent if a weak
turned Shield would be forced to retreat onto one of its own unturned Shields.
By discarded the entire Shield, the remaining Shield can turn and attack
its opponent (which may or may not have been weakened from the prior fight.)
If the loser CANNOT retreat because it has no space under its control to
retreat to, the Shield is automatically destroyed.
Examples: Allen flies over one of Bob's Shield to attack Bob's second Shield.
If Allen wins, Bob must retreat one space in any direction to space under
his control. He may, if he wishes, to retreat into the space that has the
other Shield. If he does that, one Shield is discarded and Bob can only keep
up to 30 points worth of creatures. The remaining Shield is turned if either
of his two Shields had been turned before the combat.
If Bob wins the combat, Allen must move back one space in the direction he
came even though he originally travelled two. HOWEVER, the space is occupied
by Bob's other shield. Therefore, Allen's shield is destroyed.
HEALING
The most important rule in healing creatures is that only the winner can
heal creatures. The retreating Shield is considered to left their fallen
comrades behind. (Demon Hordes of Kabod are an explicit exception to the
rule; card text always overrides the rulebook.)
The second rule to remember is that you cannot use a creature that you just
healed to heal a second creature. (For example, if you had five Demon Hordes
of Kabod and three died, the two survivors can only heal two others. The
fifth one is lost.)
Obviously, healed creatures DO NOT count toward control of the space becuase
you have to have control of the space to heal creatures.
TERRAIN SETTLEMENT PHASE
After all Shields have been turned and all movement completed, the final
phase occurs: the Terrain Settlement Phase.
First, if your opponent has no Shields in the Disputed Lands and all the
lands either have one of your Shields or one of your terrain on them (or
are under your control by default), CONGRATULATIONS! you won.
Otherwise . . .
For each of your Terrain cards in the Disputed Land area that has one of
your opponent's Shields sitting on it: remove your Terrain card. Your opponent
does the same for your Shields. This represents the terrain changing hands.
Next, for each of your Shields that is sitting on a disputed land space
that has no terrain card, you must play a terrain card from your hand. If
you
do not have a Terrain card to play, you may spend a stone and place any card
from your Storage Hand or Creature Pen face-down in the terrain space, with
the word "Guardians" facing you to indicate that it is your card.
This face-down card is not considered to be any of the basic terrain types.
If you don't have any cards to put down, or do not have stones to pay for
a face-down card, or just choose not to play a Terrain card (you don't have
to even if you have them), you can instead discard a creature from beneath
the Shield. This creature is discarded -- it doesn't become a face-down terrain
card; the space remains terrainless.
If you discard the last creature, the Shield is destroyed (this counts for
your opponent's goal).
You CANNOT replace your own terrain card, unless you have some means of removing
the existing one (such as a Hammer of Doom or Ancient Tome of Dispansation).
If you place a terrain card and your opponent plays Hammer of Doom before
the end of the phase, you are required to play another card (or drop a creature).
THE TURN IS OVER, GO BACK TO THE DRAW & ORGANIZE PHASE
If no one has won, go back to the Draw & Organize phase. Take note of
the number of lands under your control and under your opponent's control
(include the ones that you control by default). If you control more than
you opponent, add your MDL (most disputed lands) to the number of cards that
you draw. If you have fewer, subtract your LDL (least disputed lands) from
the number of cards that you draw. If you're tied, don't modify the number.
Next, whoever had the lower Up-card on the previous turn, draws extra cards
equal to the LUC (low Up-card) bonus.
Your previous Up-card is the first card you draw, with the following exceptions:
if your Guardian is Tes Let, you have the option to discard the Up card and
start drawing with the next card (this is his ability and if printed on the
card); if you are not entitled to draw any cards this turn, discard the Up-card
and turn the next card as your Up-card.
If you run out of cards, you do NOT lose automatically (though it's pretty likely that you'll lose eventually). However, you cannot draw any more cards into your hand
-- you have to play with what you have. Randomly draw a card
from your discard pile as your Up-card.
Confused? That's normal. Try it out a few times and you'll get the hang
of it.
![]() eck Design
eck Design
After an idea of Andre ! Please send your own deck idea to contact@philbarfly.com
"The no secondary attack deck" by Andre
The main idea is that you try to win your primary match up at all cost. Nothing else matters. Just play your creatures in combat, if you win match up ok, if you lose match up - then bribe or channel to win the match up. normaly you should win almost every combat especially against decks with small creatures. You can even use shield terrains, because 25 points are enough for your primary match ups.
Guardian: Gaar: For 2 Powerstones channel 5pts. to a non channel creature
Stonghold: Khnumian Stronghold
Shilds: 4x Demonic
Standard Bearer: 2x Brom's Demonic 2 +2 when attacking
Land: 8x Shild terrain ( "Demonic" if you want to keep the style)
Spells & Items:
3x Disspell Magic
5x Babes
2x Gold (you are only afraid of "big" creatures, and they are normaly
bribed with babes or beer)
5x Beer
5x Shroud of Grahzue
2x Rocks of skull cracking (because flying shields are always strong)
4x Hammer of doom (against terrain bonus and "anti-bribe-lands")
Stonghold Upgrades
2x Sacificial altar (because you NEED power stones)
Creatures:
5x Roving Force Inferno
5x Mist veiler
5x Roaming Steam Geyser
5x Tangle Web (with this card you will kill one creature, because if you
beat it in primary
it is dead, if you dont, it will normaly be destroid after combat. Its in the
deck because it has 8 vitality (fits 12+10+8=30) and fits in the strategy)
5x Vesuvious Rex
3x Great Ba'te
Summary:
28 Creatures
26 Spells
2 Stonghold Upgrades
8 Shild terrains
4 Shilds
2 Standard Bearer
All in all = 70 Cards
Ok the RFI is R1 and so you probably dont have it 5 times, but i think it'll
work with 3 times
almost as well.
Guardians
is edited by FPG Inc. and Jeux Descartes for the French version.
Guardians TM, a game created by Keith Parkinson and Luke Peterschmidt.
(c) 1995, 1996 Keith Parkinson and FPG, Inc.
Guardians is a trademark of FPG, inc.
FPG and Guardians are trademarks of FPG, Inc. (All rights reserved).
Illustrations (c) 1995, 1996 Brom, Don Maitz, Keith Parkinson, Mike Ploog, James
Warhola, Den alias Beauvais, Wilson, Sweet, Shaw, Kelly, Elmore, and Hescox...
All the
pictures presented on this site are and stay propriety of their authors.
This site has been realized with the authorization of Jeux Descartes.
